Fournisseur de service OAuth2 Google(administration)
De Wiki1000
(Différences entre les versions)
| (Une révision intermédiaire par un utilisateur est masquée) | |||
| Ligne 9 : | Ligne 9 : | ||
Il s'agit de | Il s'agit de | ||
| − | + | # Créer un nouveau projet | |
| − | + | # Ajouter l'API Google calendar à ce projet | |
| − | + | # Créer l'écran d'autorisation OAuth | |
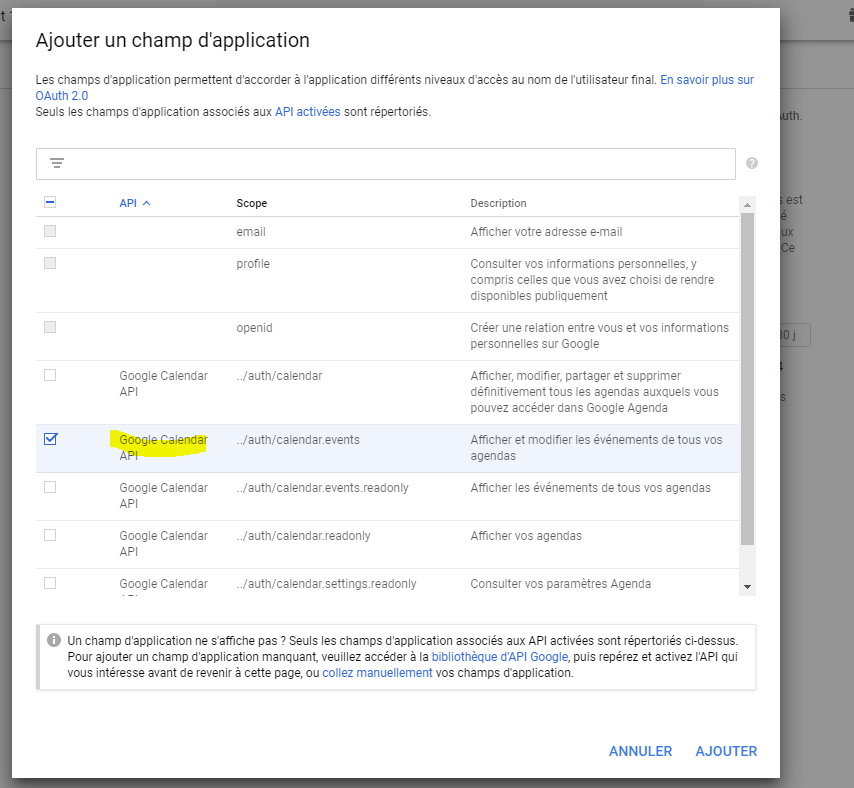
| − | + | # Ajouter à l'écran d'autorisation OAuth le champs d'application Google calendar | |
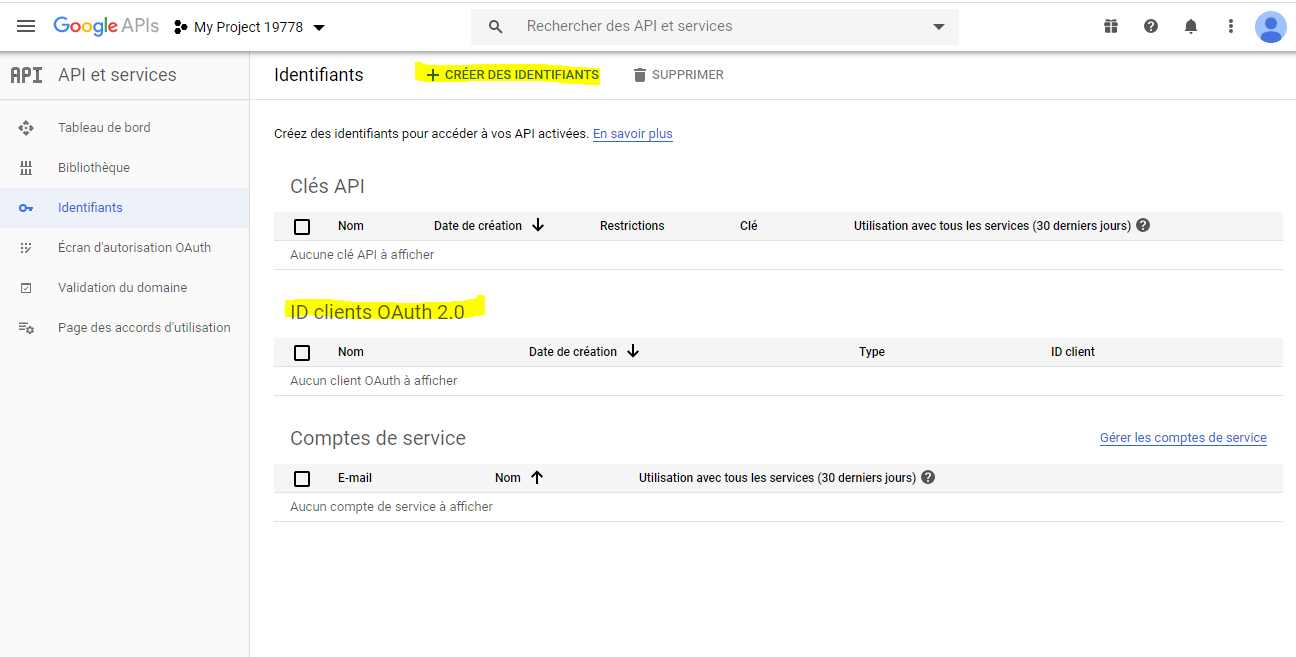
| − | + | # Créer un identifiant OAuth2 (afin d'obtenir le clientID et le clientSecret) | |
| − | + | # Paramétrer l'adresse de rappel adéquate https://[hôte]/oauth2_success_2.l1000 (ou bien https://[hôte]/[nom du service]/server/oauth2_success_2.l1000 si IIS est utilisé) | |
==Exemple== | ==Exemple== | ||
| − | [[image: | + | [[image:auth_srv_google_1.png]] |
| − | [[image: | + | [[image:auth_srv_google_2.png]] |
| − | [[image: | + | [[image:auth_srv_google_4.png]] |
| − | [[image: | + | [[image:auth_srv_google_5.png]] |
| − | [[image: | + | [[image:auth_srv_google_6.png]] |
| − | [[image: | + | [[image:auth_srv_google_7.png]] |
| − | [[image: | + | [[image:auth_srv_google_8.png]] |
| − | [[image: | + | [[image:auth_srv_google_9.png]] |
| − | [[image: | + | [[image:auth_srv_google_10.png]] |
| − | [[image: | + | [[image:auth_srv_google_11.png]] |
Version actuelle en date du 15 mai 2020 à 14:50
Prérequis
Il est nécessaire de détenir un compte GSuite
Les utilisateurs doivent être créés.
Paramétrage
Il s'agit de
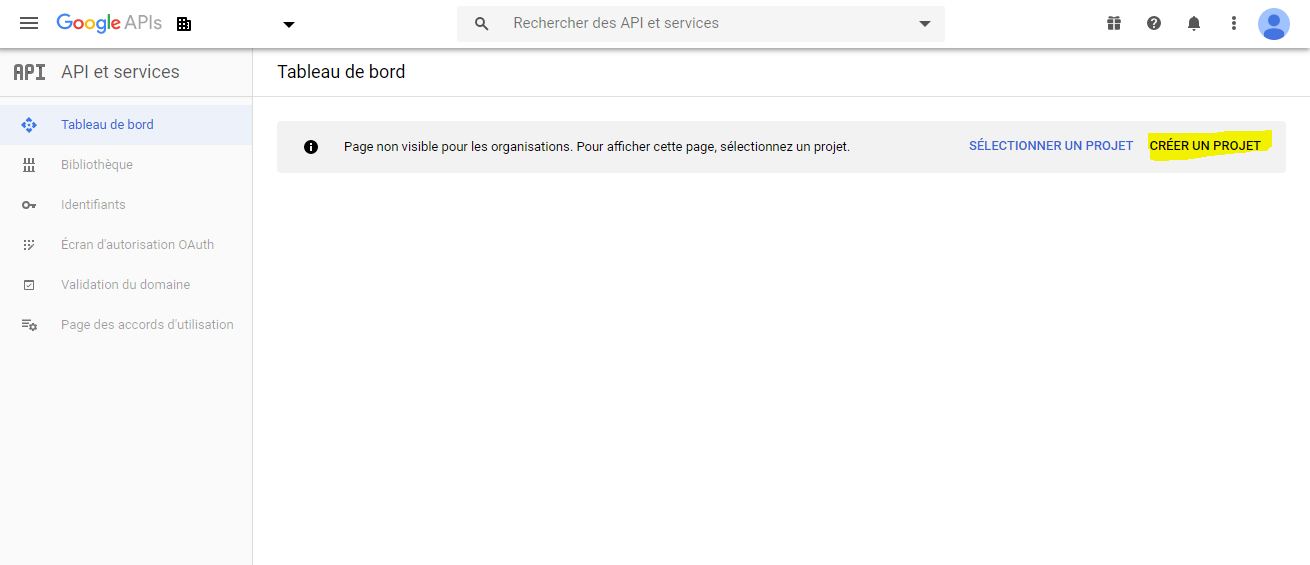
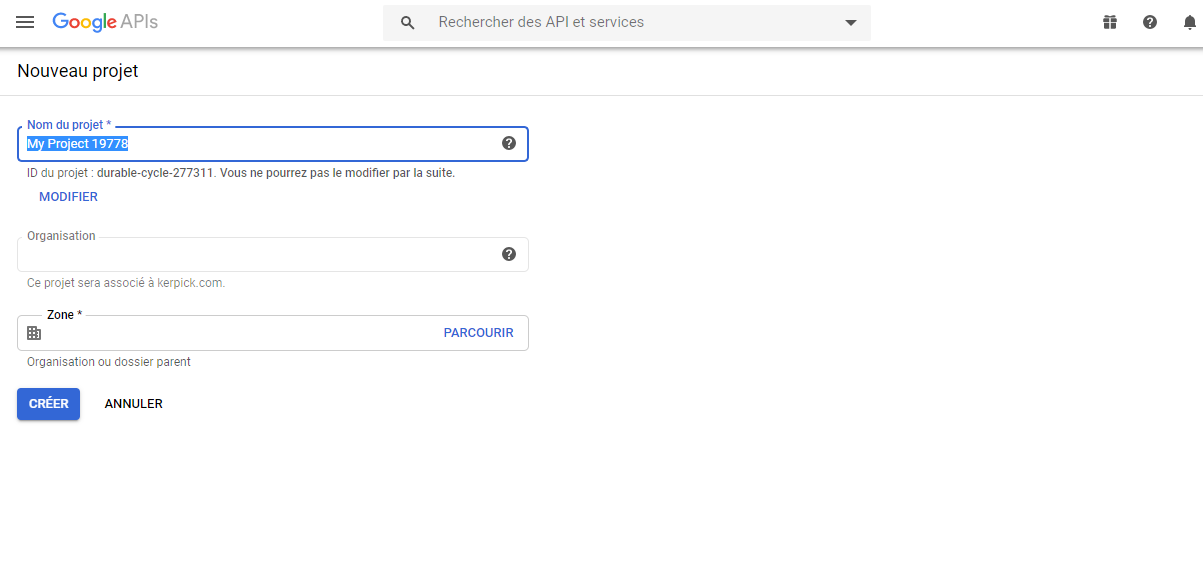
- Créer un nouveau projet
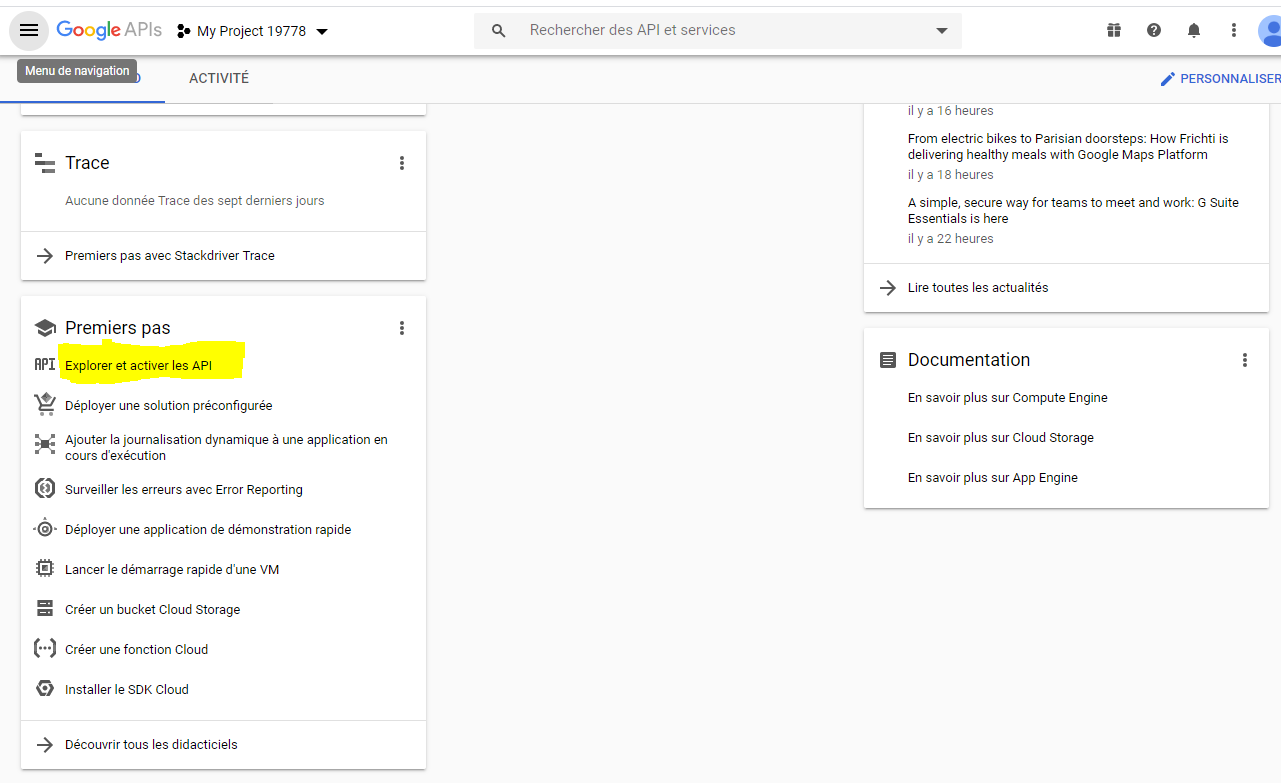
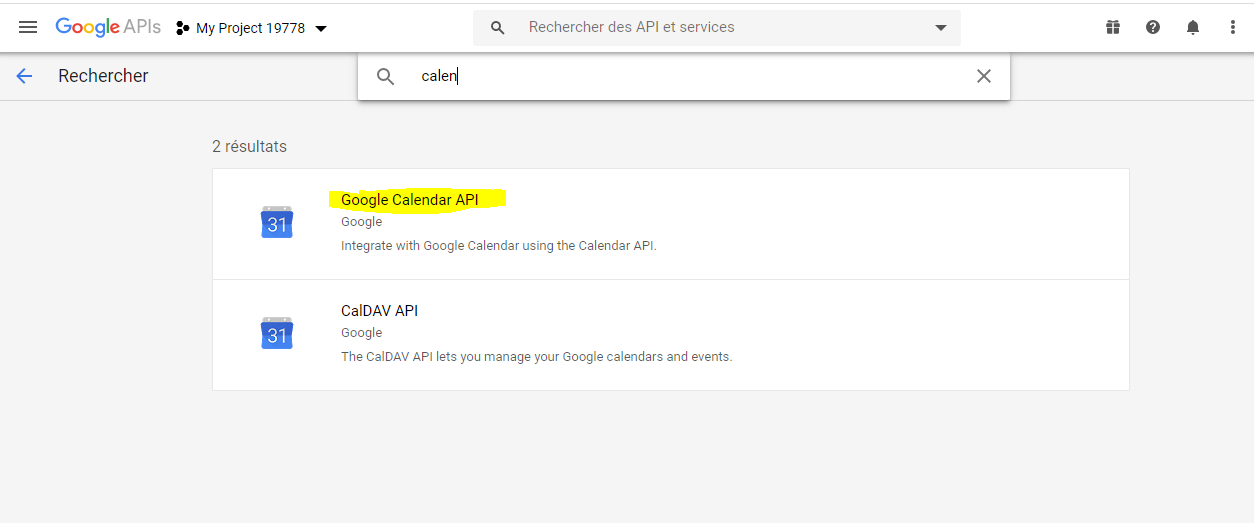
- Ajouter l'API Google calendar à ce projet
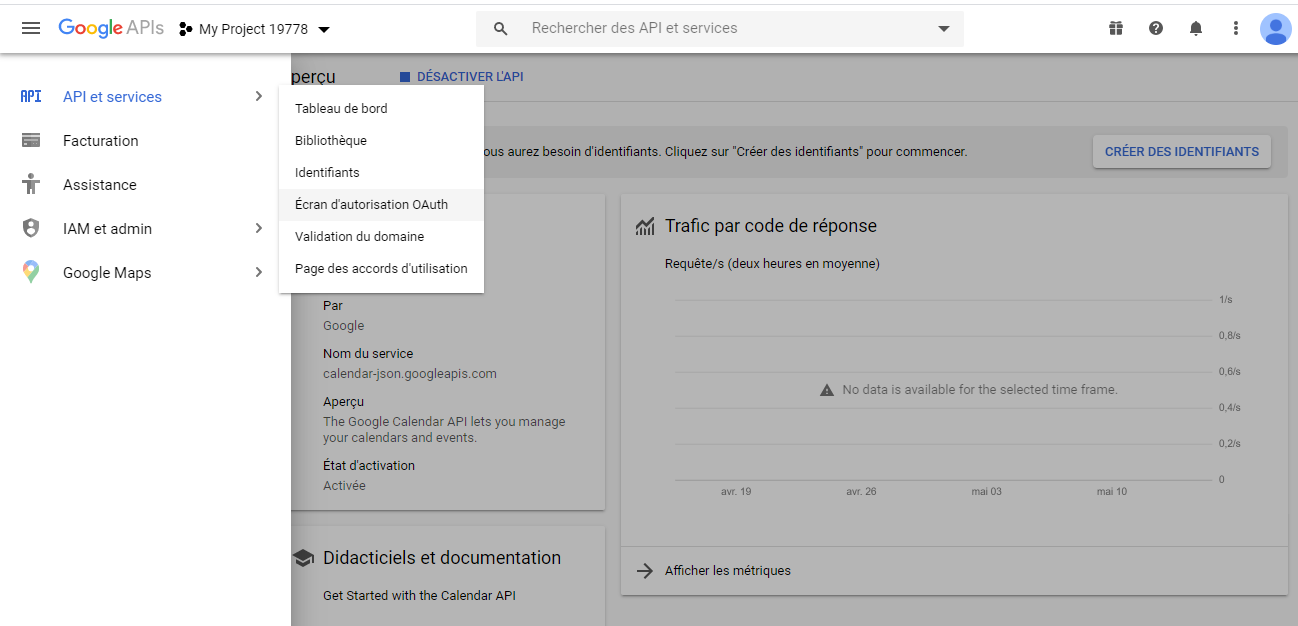
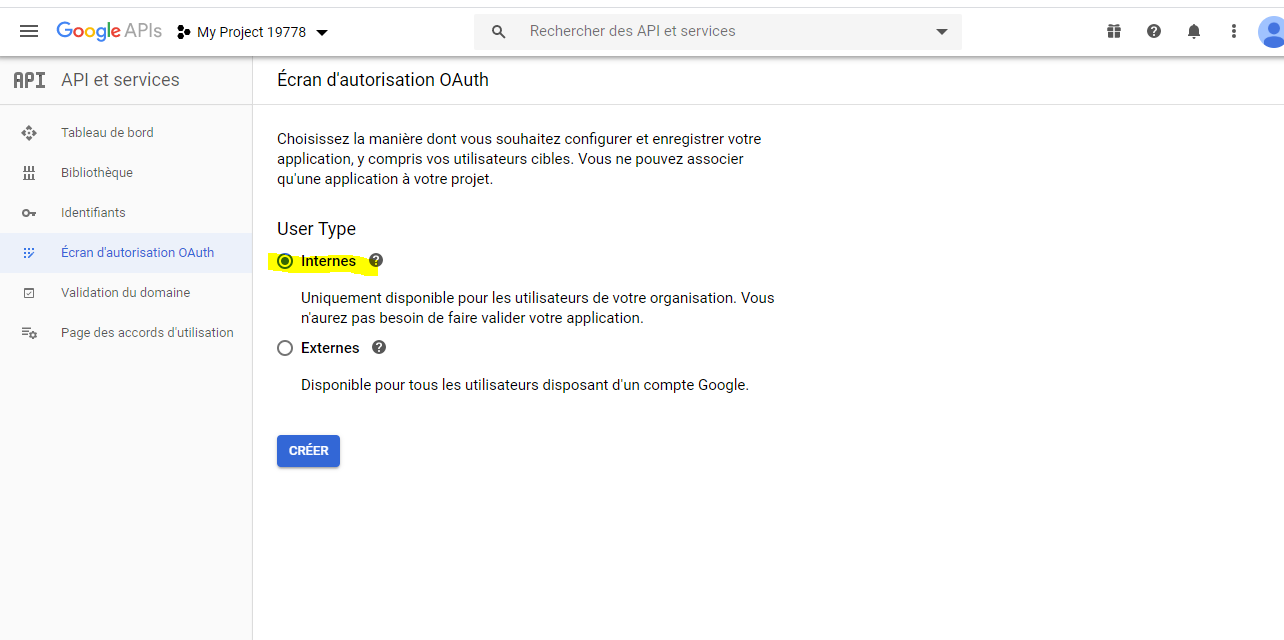
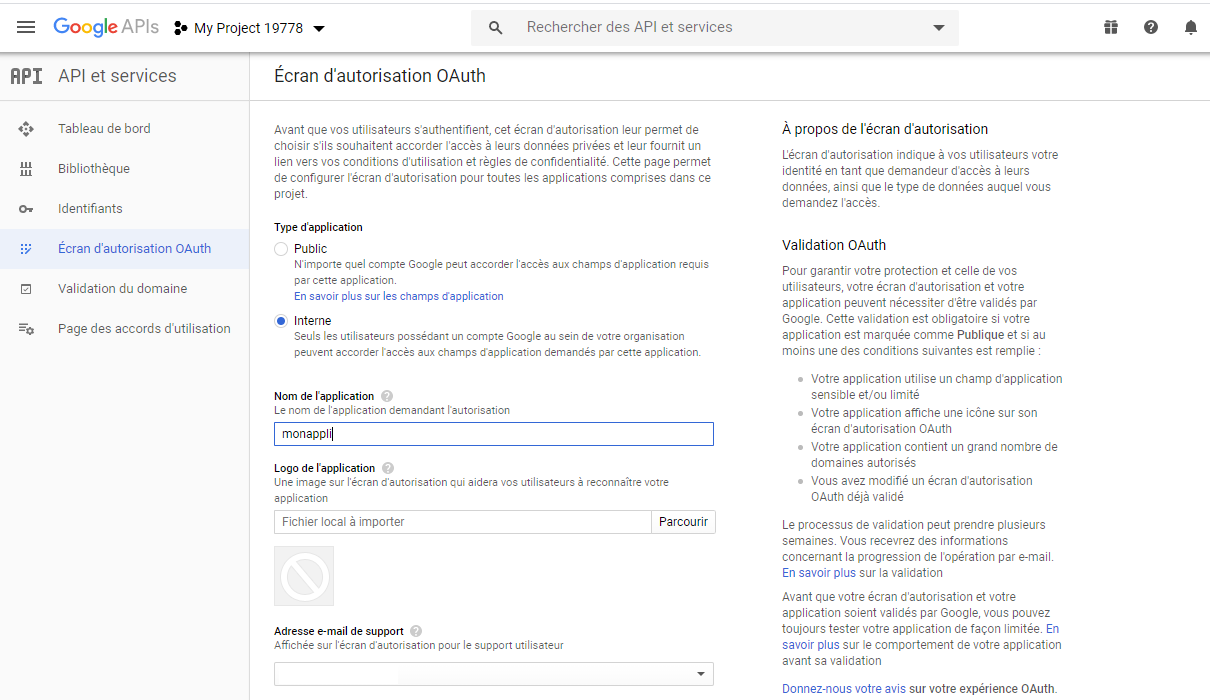
- Créer l'écran d'autorisation OAuth
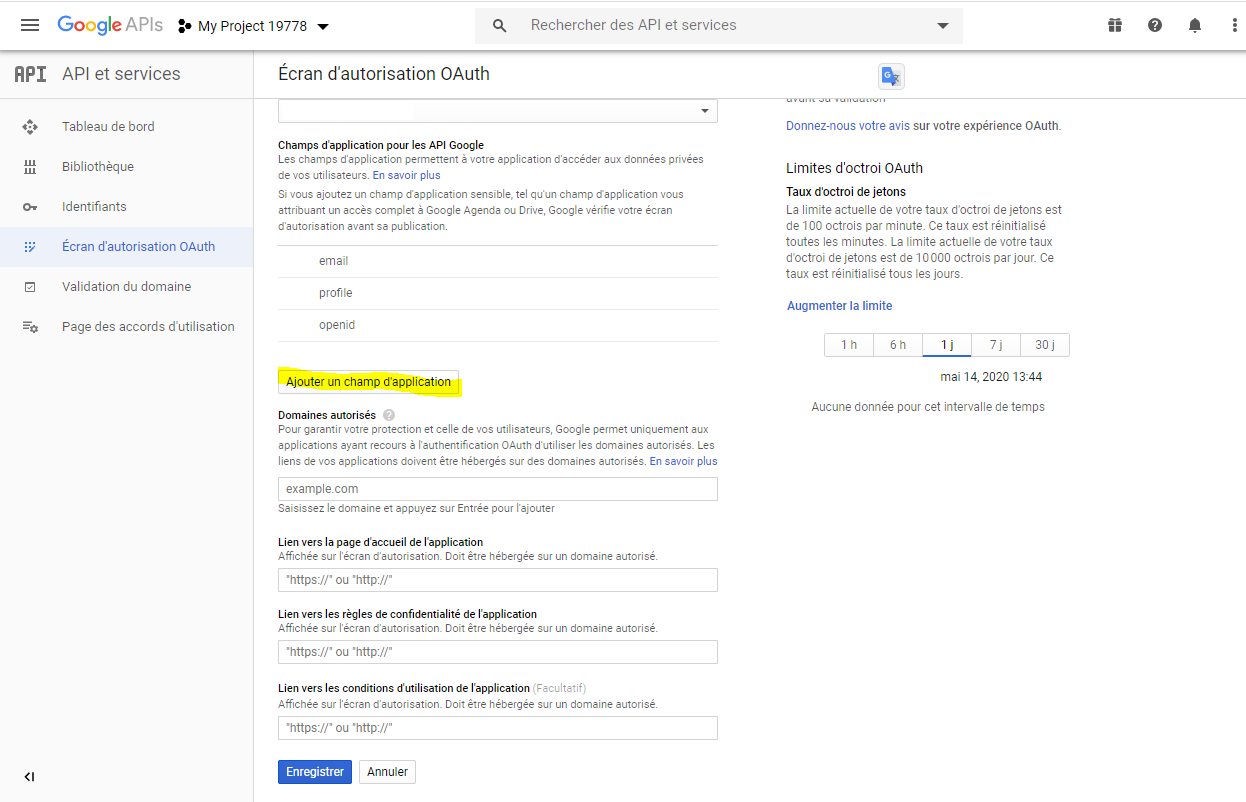
- Ajouter à l'écran d'autorisation OAuth le champs d'application Google calendar
- Créer un identifiant OAuth2 (afin d'obtenir le clientID et le clientSecret)
- Paramétrer l'adresse de rappel adéquate https://[hôte]/oauth2_success_2.l1000 (ou bien https://[hôte]/[nom du service]/server/oauth2_success_2.l1000 si IIS est utilisé)
Exemple
| Whos here now: Members 0 Guests 0 Bots & Crawlers 1 |
